How to Draw Ariel Easy Step by Step
The Little Mermaid is one of the most beloved of all the Disney films. Fans around the world fall in love with the story of the mermaid Ariel falling for a human on land.
With so many fans of this charming and classic film, it can be great to learn how to draw Ariel so that favorite scenes from the film can be recreated.
If you love this film and this character as well, then you will want to read all the way to the end of this guide.
This step-by-step guide on how to draw Ariel will help you to learn how to portray this classic mermaid character.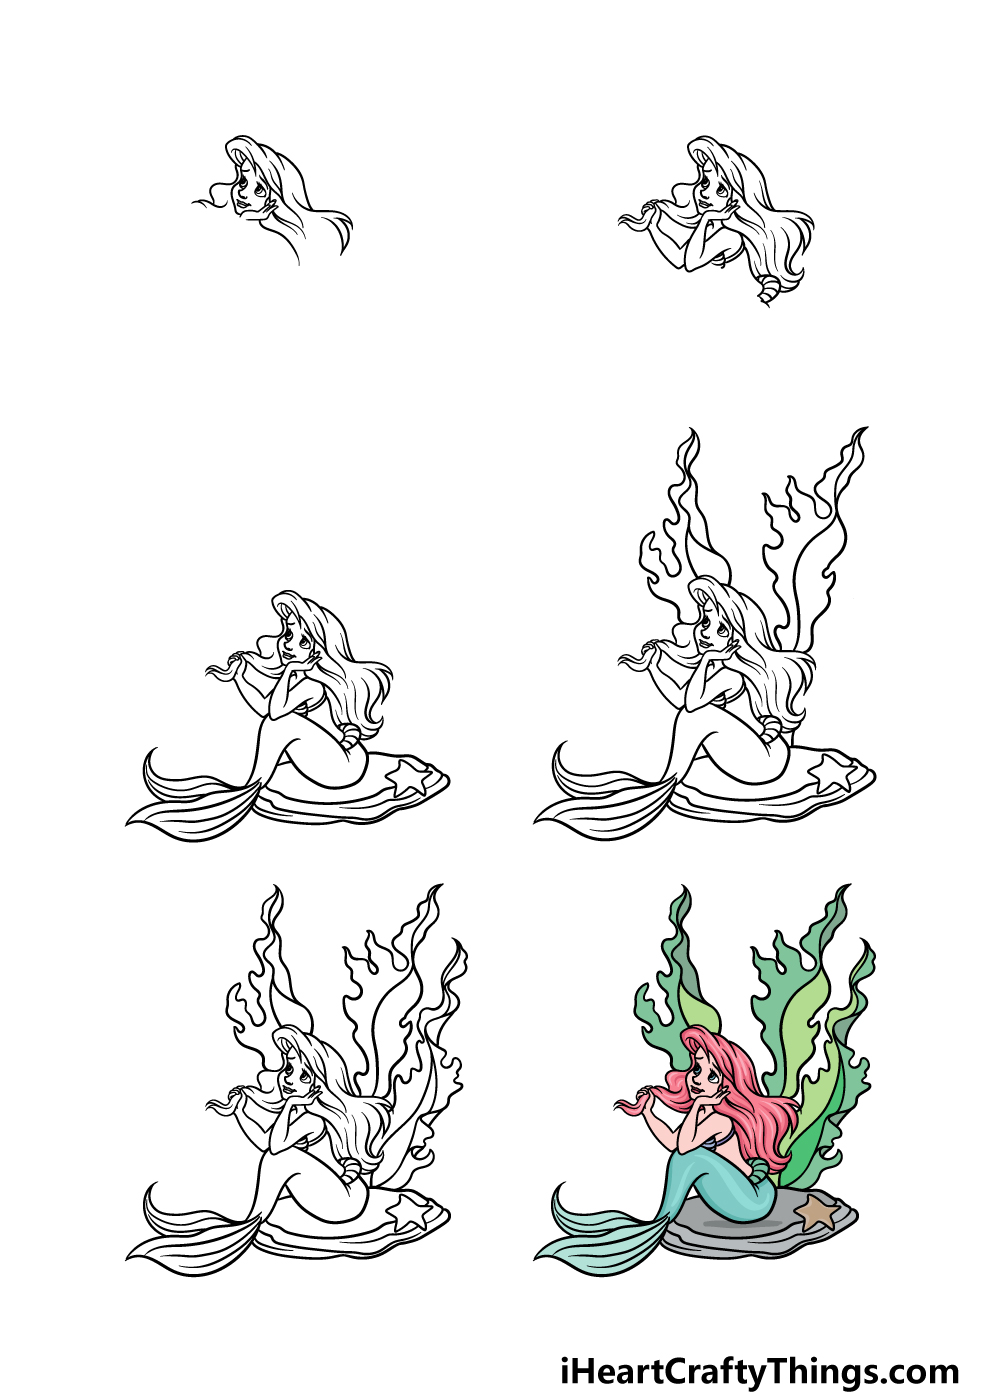
What's in this Blog Post
- How to Ariel – Let's Get Started!
- Step 1
- Step 2 – Next, draw some arms for Ariel
- Step 3 – Now, draw her fishtail and the rock she's sitting on
- Step 4 – Now, draw some seaweed in the background
- Step 5 – Next, draw the final details of your Ariel drawing
- Step 6 – Finish off your Ariel drawing with some color
- Your Ariel Drawing is Complete!
How to Ariel – Let's Get Started!
Step 1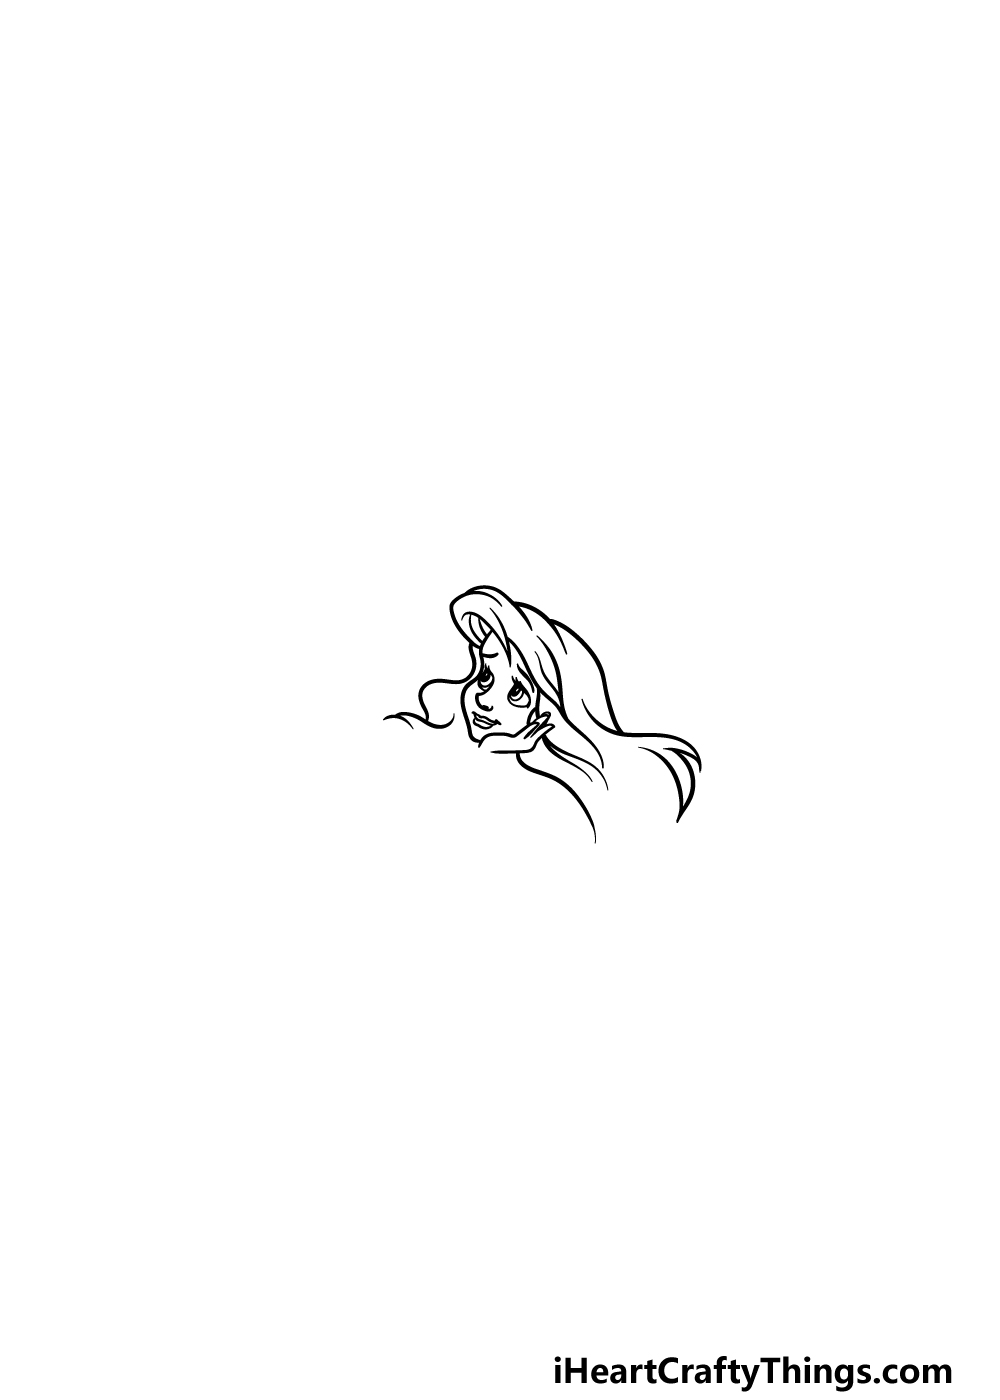
In this first step of our guide on how to draw Ariel, we will be starting with her head and hair. Remember that she is underwater, so we will be drawing her hair flowing around her head.
First, start with a curved line for her nose, and then use some rounded shapes for her big eyes.
Then you can draw her smiling lips. Her head will be resting on her hand, so use some curved lines for her hand beneath her head.
Then, you can draw the rest of her face outline. Once the face is done, we will be drawing her hair.
To have her hair flowing around her head, use some curved and wavy lines as it appears in the reference image. Then we are ready for step 2 of the guide, so let's move on!
Step 2 – Next, draw some arms for Ariel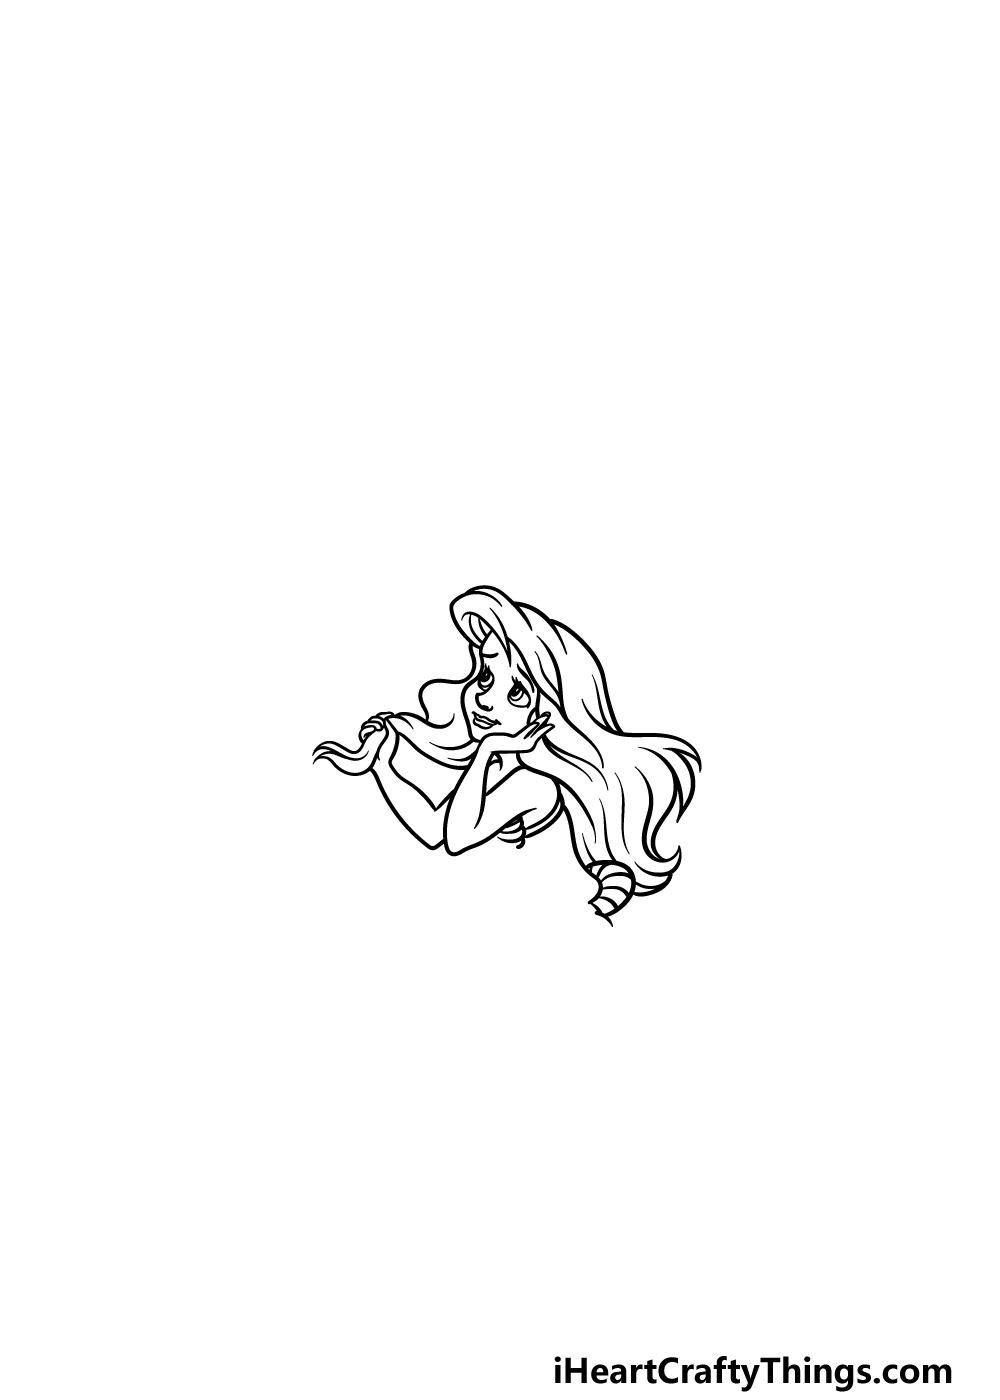
We will start to draw some arms for her in this step of your Ariel drawing. You drew her hand beneath her head in the last step, so in this part we will draw her hand coming down from that hand.
It will bend and extend up to the shoulder, which you can draw with a rounded line. Her other arm will extend outward from the left-hand side and be bent upward.
That arm will end in a hand running through her hair to give a contemplative look.
Finally, finish off with a rounded shape with lines on it for the start of her fishtail.
Step 3 – Now, draw her fishtail and the rock she's sitting on
There is quite a lot that we will be adding in this step of our guide on how to draw Ariel, so we will take it nice and slowly.
The main aspect we will be adding is the fish half of her body. This half of her body will be bent over so that her elbows are leaning on it.
You'll see what we mean in the reference image, and it should be an easy part to draw! You can then use some more wavy lines for the end of her fish tale and there will be some lines on the interior of this part as well.
Then you can draw the big flat stone that she is seated on and also add a little starfish onto it for some more detail.
That's all there is to it for this part, so in the next few steps we can start to work on some background elements.
Step 4 – Now, draw some seaweed in the background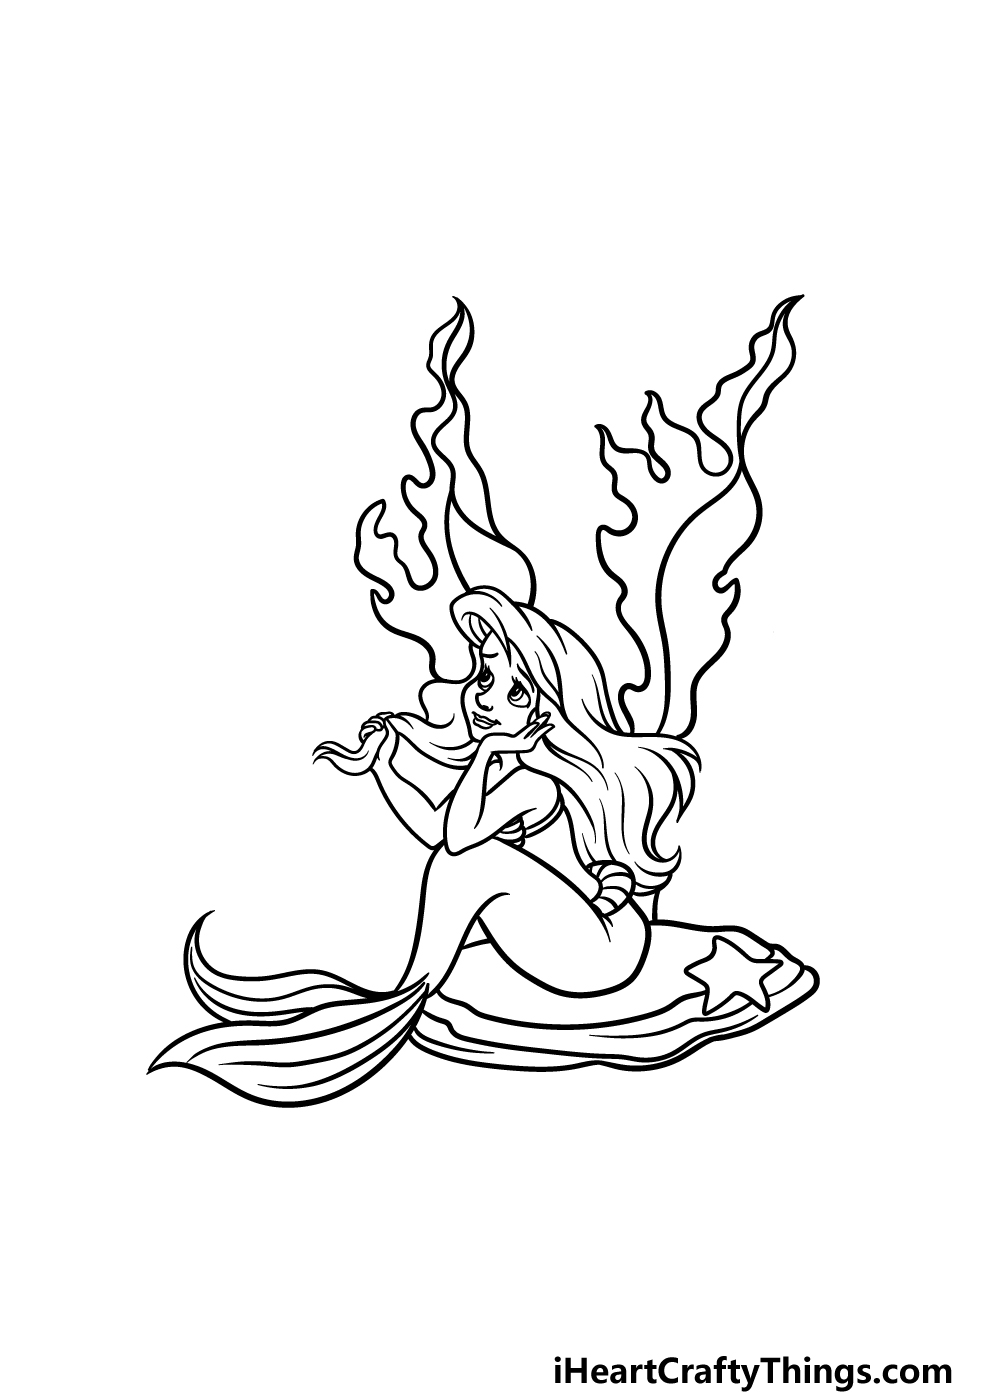
Now that you have pretty much finished drawing Ariel, we can start to work on the background scene for your Ariel drawing.
To go nicely with the underwater aspect of this scene, we will be drawing some big strands of seaweed behind her.
These will be drawn with some sharply wavy lines to create the seaweed flowing behind her.
We will add some more seaweed in the next step, plus you will have a chance to add some of your very own details to the image!
Step 5 – Next, draw the final details of your Ariel drawing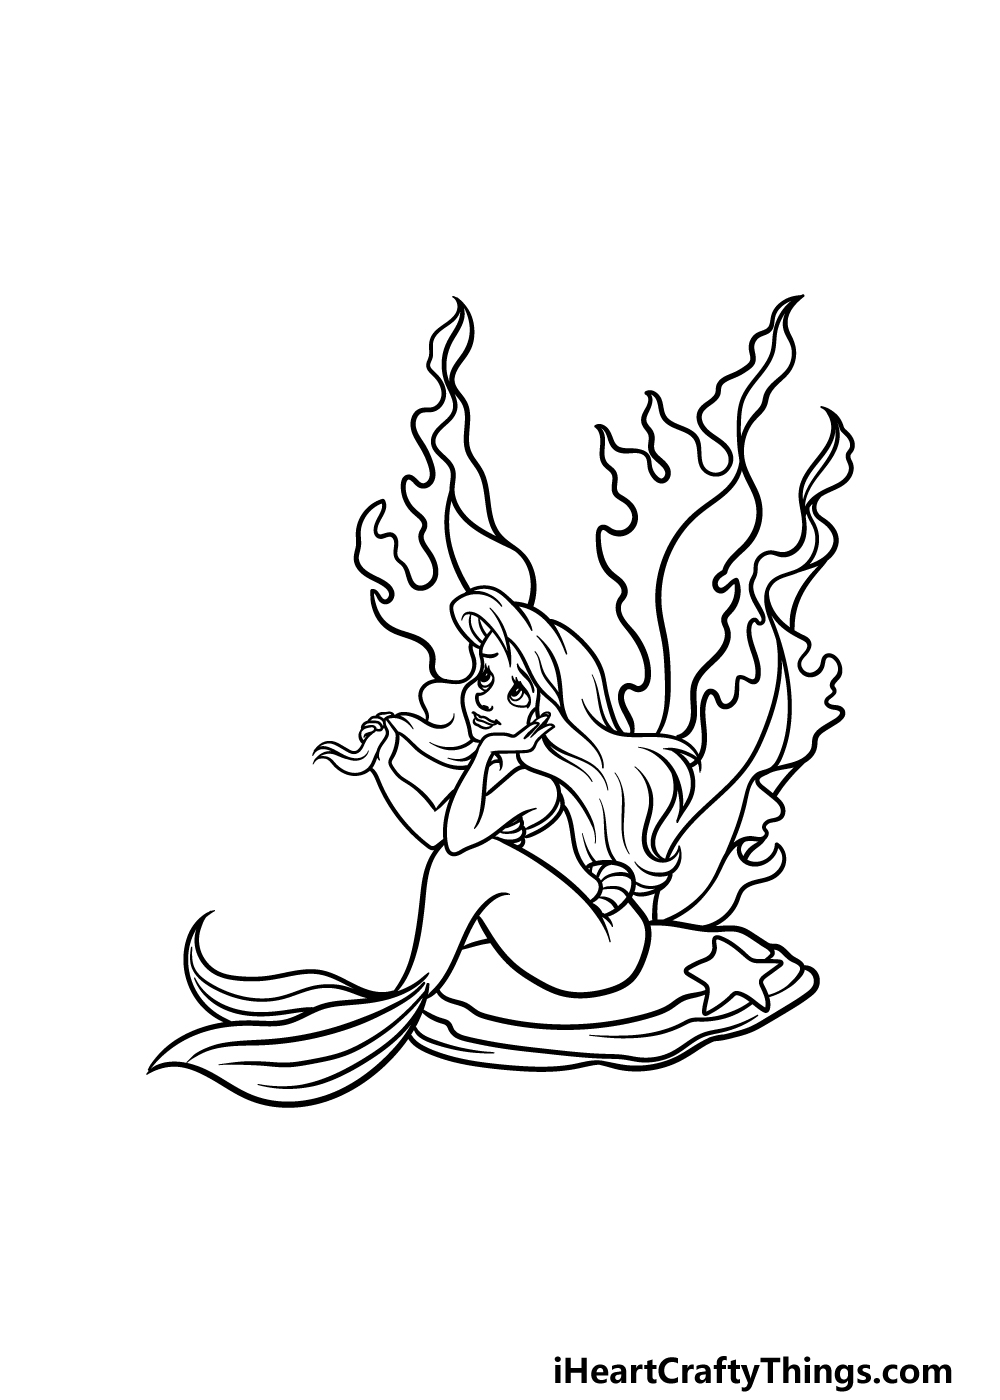
This step of our guide on how to draw Ariel will be all about fishing off the background of the picture. You can do this by drawing another large strand of seaweed flowing behind her.
Once you have added this, you are ready for the final step! As we mentioned in the last step, this is also a great opportunity to add some more details of your own.
There are lots of ideas that you could go for to do this! One idea would be to draw some more characters from the film.
You could maybe add her friends Flounder the fish and Sebastian the crab, or even her father King Triton!
These are just a few ideas for how you could personalize this drawing, but we will be interested to see what else you can come up with. What do you think you would like to add to finish off this Ariel drawing?
Step 6 – Finish off your Ariel drawing with some color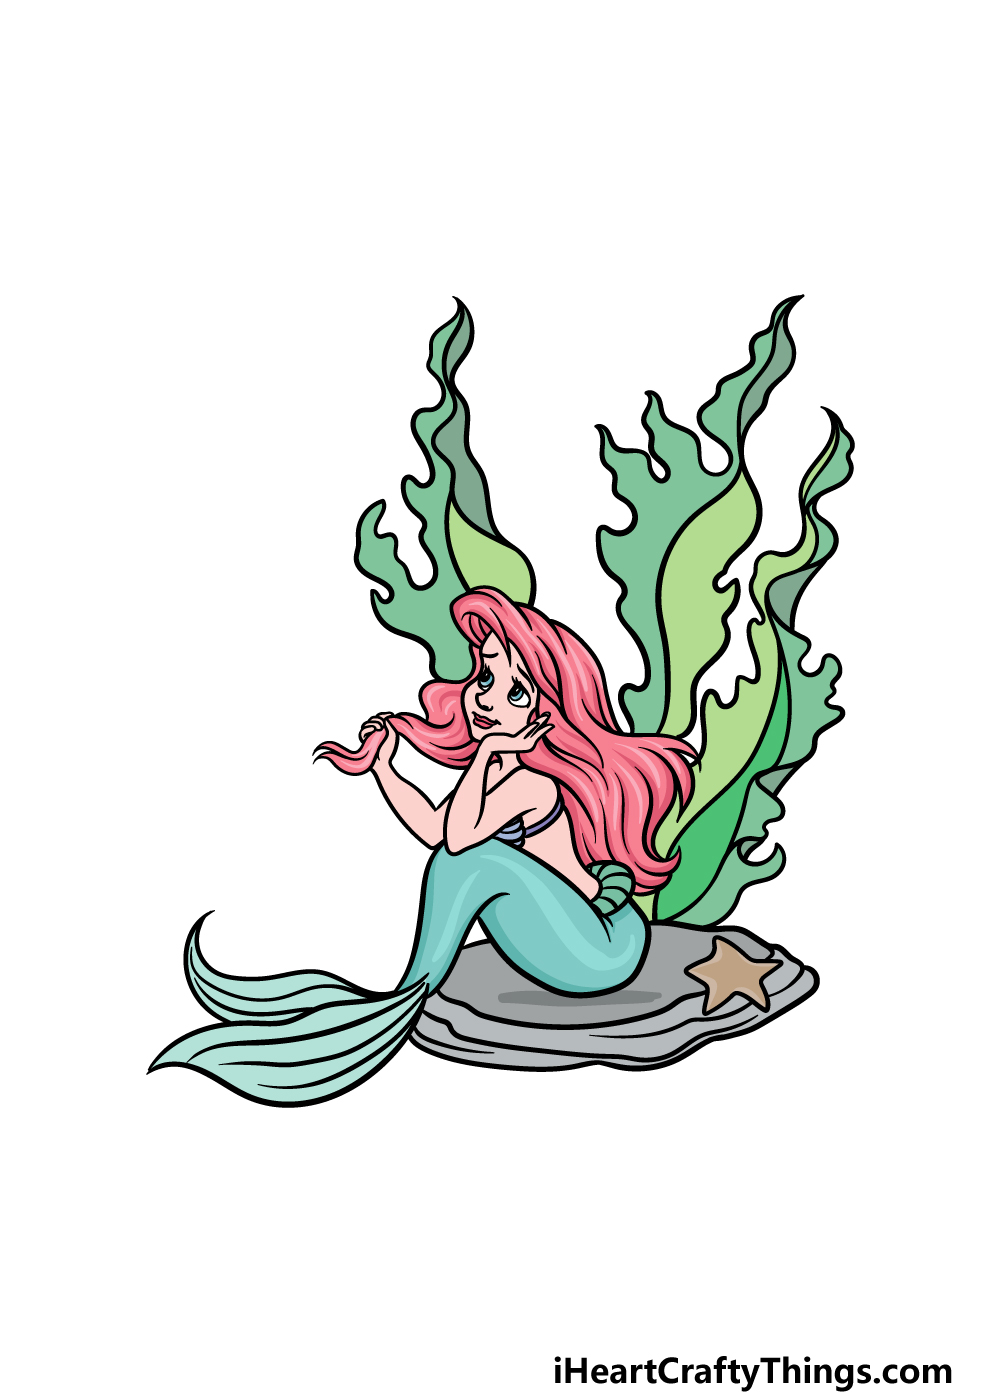
In the final part of your Ariel drawing, we will finish it off with some amazing colors! In the reference image, we showed you the colors that Ariel has in the films, so you can use that as an example if you would like it to be consistent to her look.
These colors include bright red for her hair, greens and blues for her tail fin and seaweed and then some grays for the rock she is sitting on.
These are the colors we went for, but you can also add or remove some colors as you please as well. What colors and art mediums will you use to finish this off?
Your Ariel Drawing is Complete!
You have completed all six steps of this guide on how to draw Ariel! We hope that this guide made it fun and easy for you to complete this drawing of this classic character even though she is highly detailed.
Having a guide like this can really help to make it so that you can focus on the fun of drawing with no frustration!
The great news about this guide is that there are plenty more like it on our website. Be sure to visit us there for more fun, and be sure to check in often to never miss out on the guides that we upload frequently.
Once your Ariel drawing is complete, please go ahead and share it on our Facebook and Pinterest pages. We can't wait to see your artwork!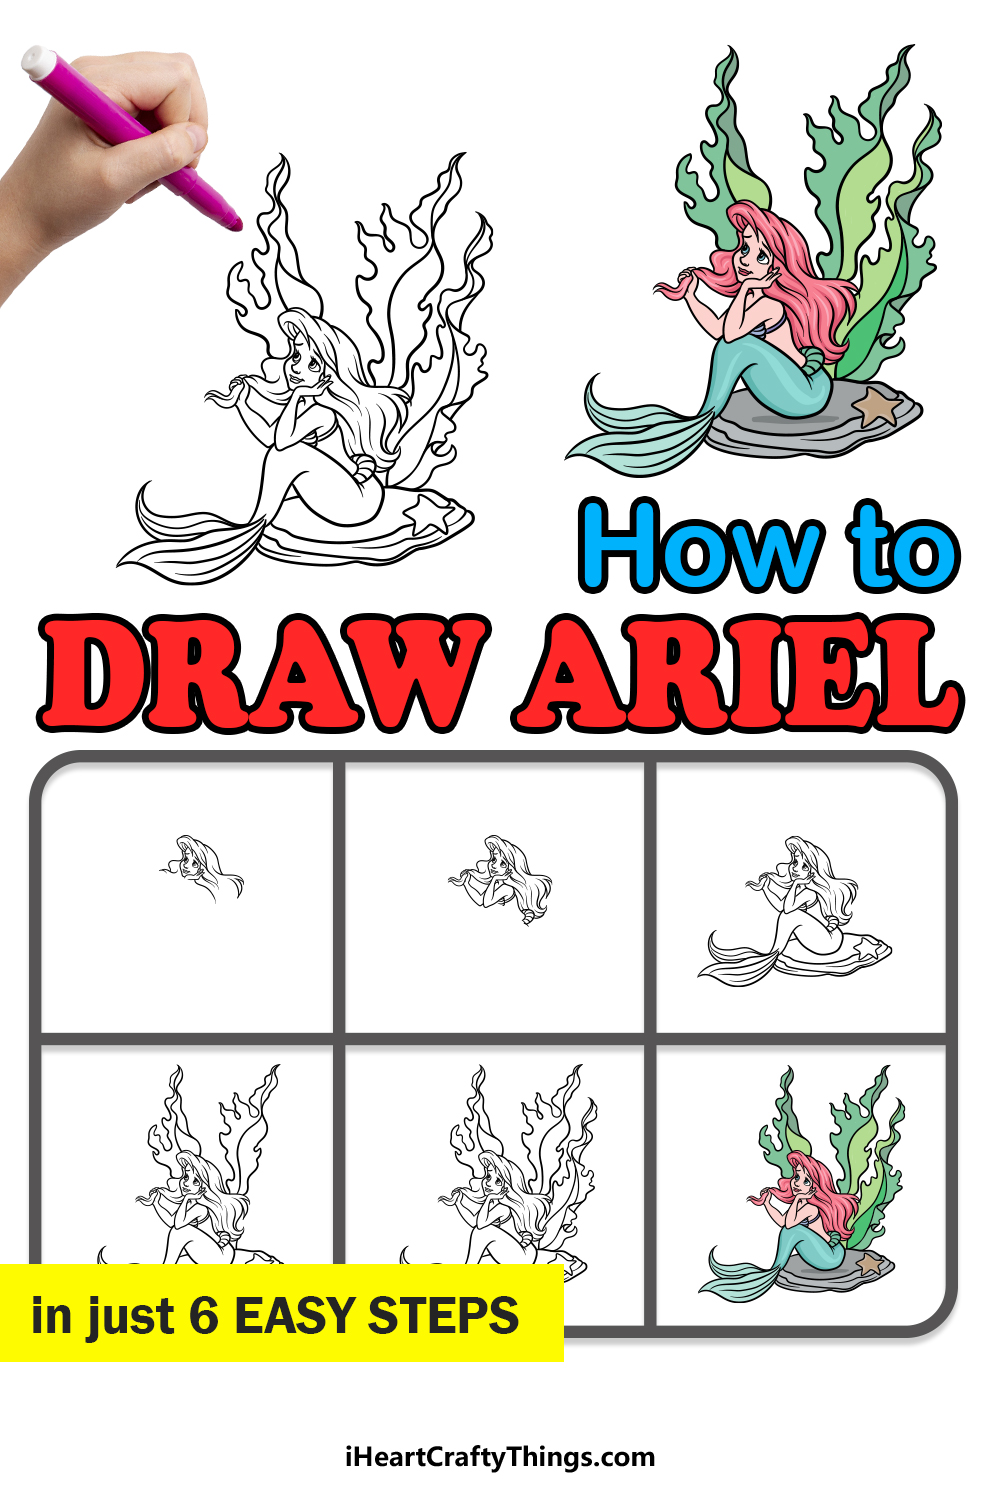
How to Draw Ariel Easy Step by Step
Source: https://iheartcraftythings.com/ariel-drawing.html